Keiki in the Kitchen: 5 Easy School Lunches You Can Make in a Snap
Prepare one week of school lunches in less than three hours.
When I was a kid, my Japanese-Okinawan mother sent me to school every morning with artfully arranged lunches, right down to the color-coordinated vegetables, utensils and bento box. I remember thinking, “Why can’t I have normal PB&J sandwiches in brown bags like my friends?”
Turns out, Mom knew something I didn’t until I started making lunches for my daughter: Bento-making is easy when you set aside one day to pack a week’s worth of lunches!
Here are some of our favorite lunch combinations, then scroll down for our seven steps for easy lunch planning.
See also: 🍱 19 Super-Cute and Clever Accessories for Your Keiki’s Lunch
Day 1: Egg Cup Bento
(Freeze & Reheat!)
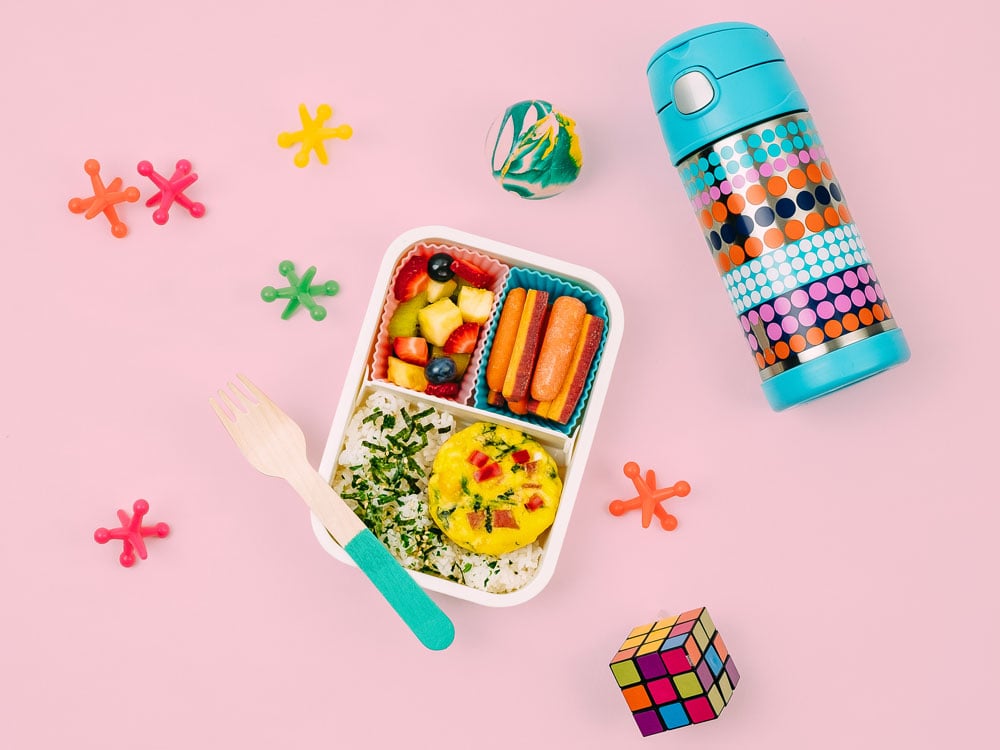
Container: Takeya LEAFLET Tight, $10.99. Nijiya Market, 451 Pi‘ikoi St. and 1009 University Ave., #101. Photo: Aaron K. Yoshino; Design and style: Christine Labrador, Brie Thalmann and Christi Young
Clockwise from right: Rainbow carrots in purple and orange. Furikake on white rice. Egg cup with ham, spinach and bell peppers. Kiwi, strawberries, blueberries and Kahuku papaya.
To Make Egg Cups:
1. Heat oven to 350 degrees. Grease the inside of a 12-cup muffin tin.
2. Crack and beat a dozen eggs in a mixing bowl.
3. Add 1 cup each of chopped frozen spinach, diced bell peppers, sliced ham, turkey bacon, and vegetables and proteins of your choice.
4. (Optional) Add ¼ cup dairy, soy or coconut milk.
5. Mix. Pour the egg mixture into the muffin tins, filling one-half to three-quarters of the way.
6. Bake for about 25 minutes, or until the eggs puff and cook through. Touch the middle of a muffin. If it is still wet, the batch isn’t ready.
7. (Optional) When eggs start to puff, remove muffin tin from oven and sprinkle grated cheese on top of each egg. Return to oven until fully baked.
8. When done, completely cool down the eggs before popping out with a butter knife.
9. Egg cups can be stored in the fridge for up to one week or in a container in the freezer for one month. Thaw in the microwave for 30 seconds or less.
Day 2: Antioxidant-Protein Box
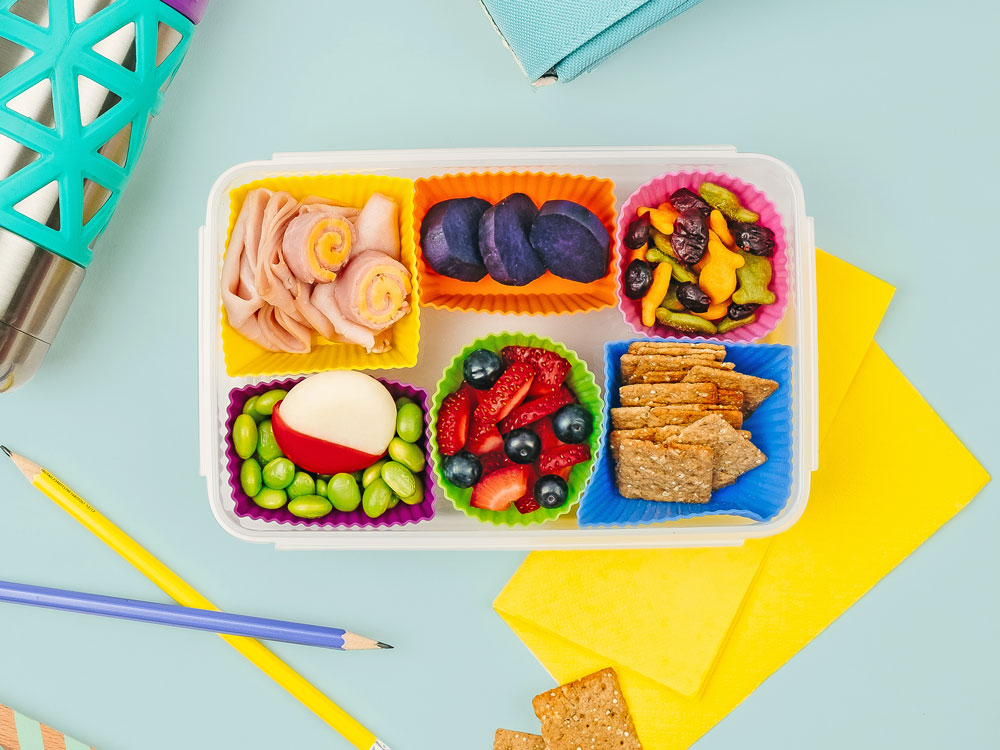
Container: Rubbermaid LunchBlox (part of six-piece set), $15.99. Target, multiple locations. Photo: Aaron K. Yoshino
Clockwise from upper left: Cheese-and-ham pinwheels. Orange cup: Okinawan sweet potato. Pink cup: Goldfish crackers and dried cranberries. Blue cup: Whole-grain crackers. Green cup: Strawberries and blueberries. Purple cup: Boiled edamame and cheese.
Cheese-and-Ham Pinwheels:
Place a thin slice of cheese on top of a ham slice. Tightly roll. The ham and cheese should stick together. Slice the log vertically into three or four pieces.
Day 3: Happy Musubi Lunch
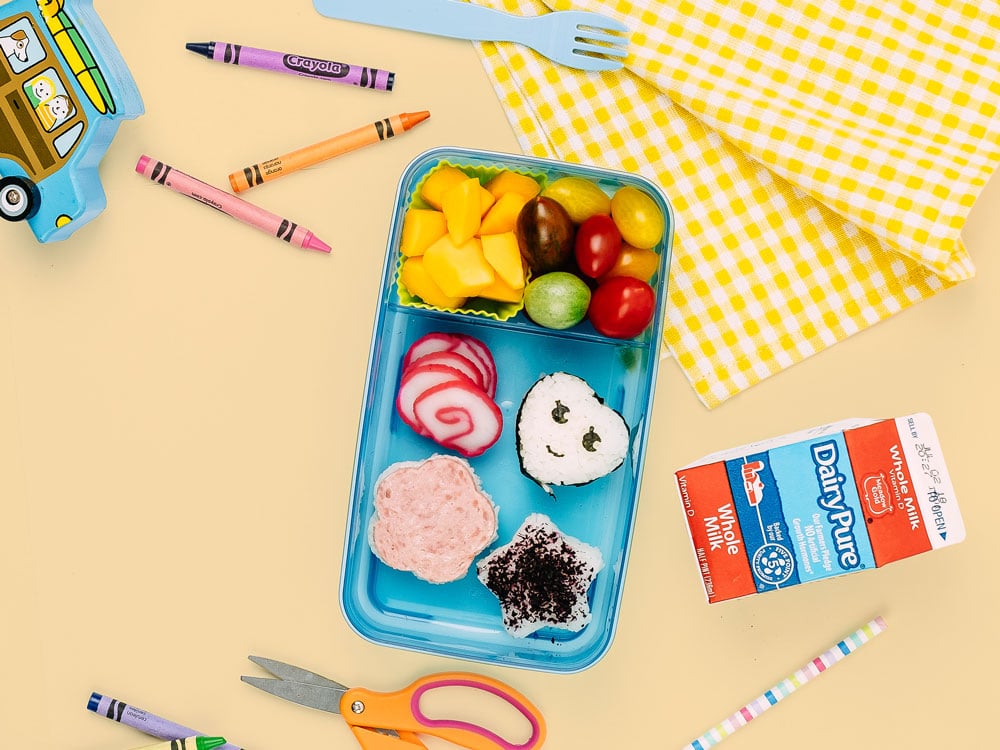
Container: Rubbermaid LunchBlox Kids (part of four-piece set), $17.99. Target, multiple locations. Photo: Aaron K. Yoshino
Top: Diced Kahuku papaya and Ho Farms grape tomatoes. Bottom clockwise from upper right: Heart-shaped musubi with nori-punched smiley face, white-rice musubi with shiso, flower-shaped Spam musubi and fish cake uzumaki.
To Make the Smiley Face:
Place a strip of dried nori (seaweed) inside a smiley-face “nori punch.” (We found ours for $11.69 on Amazon.) Press down until shapes pop out. Place on rice.
Day 4: Skewers, Stars and Stripes
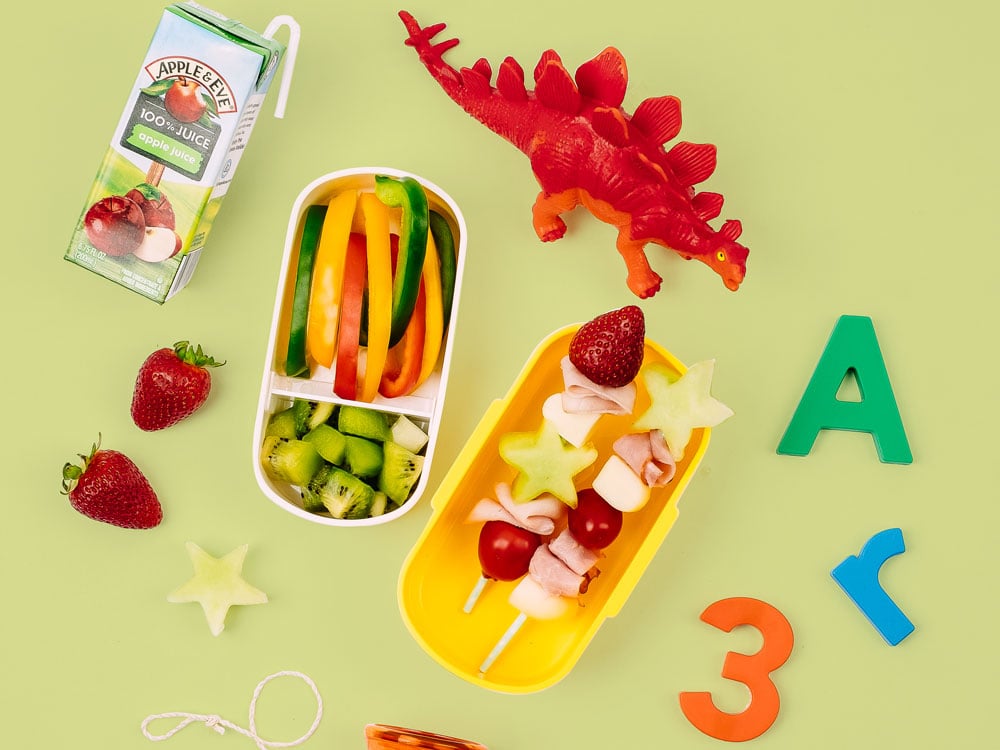
Container: Yooee stackable bento, $7.99. Don Quijote, multiple locations. Photo: Aaron K. Yoshino
Left: Red, orange and green bell pepper strips and diced kiwi. Right: Skewers with honeydew melon, cheddar-cheese cubes, folded ham slices, strawberries and Ho Farms tomatoes.
Day 5: Panda Pasta
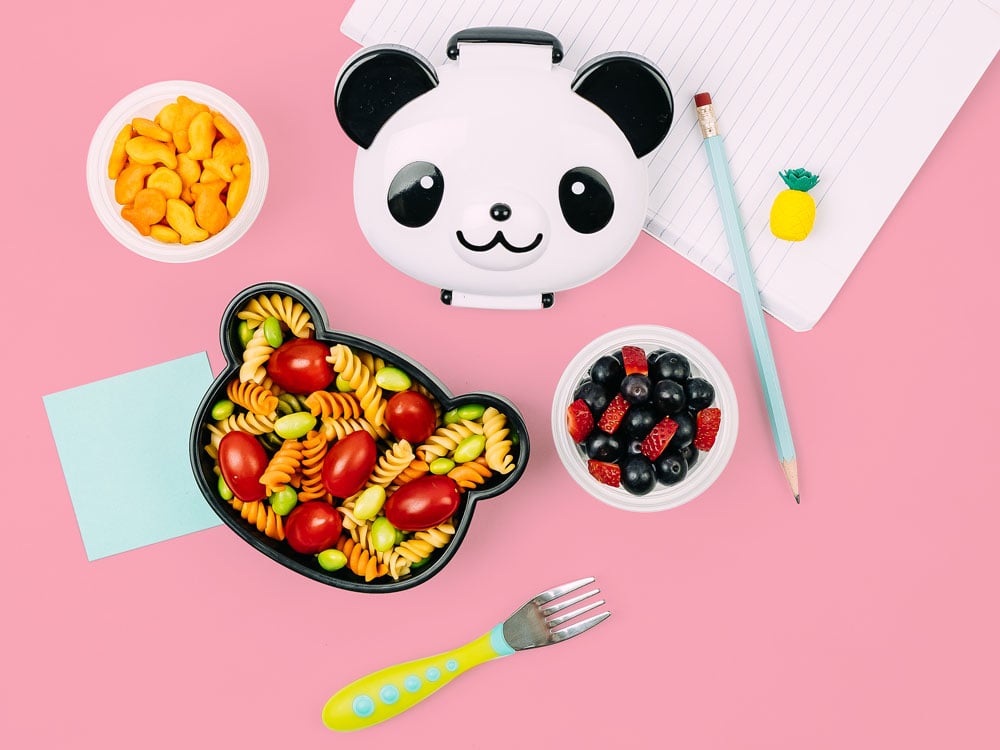
Container: Torune Panda, $14.99. Don Quijote, multiple locations. Photo: Aaron K. Yoshino
Main: Tri-color rotini, boiled edamame and Ho Farms tomatoes. Side: Strawberries, blueberries and goldfish crackers.
How We Did It
Here are Seven Steps:
1. Pick a weekend time (a Sunday afternoon, for instance) to chop and prep foods, such as fruit and vegetables, boiled edamame, cheese and ham, Goldfish crackers, fruit snacks and other foods that don’t get soggy when stored in a refrigerator.
2. “Creatively” arrange the items in five lunch containers, one for each school day. Mix and match. Leave one-third of each container empty for the “main course” that you’ll add later in the week.
3. Stack the containers in the back of your refrigerator.
4. Relax. You’ve already half done.
5. Every weekday morning, take out a lunch container and add the entrée. Some ideas are frozen meatballs and chicken nuggets, boiled sausages, pastas and dinner leftovers. Heat up the food then let cool.
6. If the food hasn’t completely cooled down (or your kids are running late!), lay a strip of paper towel on top to create a protective layer and absorb any condensation.
7. Always put a frozen ice pack inside your kids’ insulated lunch bags. When properly stored, food can stay cold for up to five hours.